Thursday, April 30, 2009

Clean & Simple CAS12

Hi friends,
Today I have a card- little card (3x3) for the Clean & Simple Challenge this week on SCS. If you don't know about it you create a card that can be easily reproduced, has few embellishments or layers. Although it may seem like they'd be easy to do, they're actually hard for me. I'm not a CAS kind of girl :) Anyhoo, I'm up for the challenge so here's my card.
For this week, the challenge was to use a small PIECE of ribbon. I used this scrap piece. I cut it so it would look like the leaves for my rose. I also used scrap strips at the borders. I wanted to add bling, dew drops, piercing or glitter, but I told myself "Put down that glue pen & just walk away!" See, I told you it's hard for me, but I'm proud of my level of self-control :) I'm off to cross off yet another day of testing off my calendar-yes!!!- gotta go!

Wednesday, April 29, 2009

Lily Wishes


Hi friends,
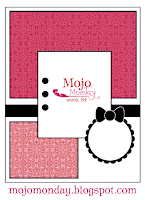
This card is for MOJO Monday sketch challenge 84. This is a very girly girl glittery card- I don't do too many of these. But, I luuuv this Enchanted Lily stamp so I had to play! I like having a sketch to get my juices flowing. I had to pierce along the right corner because it looked like something was missing. I couldn't leave it alone- type A, you know :) Thanks for peekin' in today. I'm off to cross off another day from the State Testing calendar- gotta go!

Tuesday, April 28, 2009

Teacher Tuesday

Hi friends,
Today I wanted to share one of my favorite resources- um, people really. His name is Rick Morris and he's a classroom management guru. I've seen him present at several teacher conferences and he's fantastic! He has very practical ideas & strategies. I use several of his ideas with great success. There are several of his techniques I would not be without. Some of them are:
* check off sheets
* class cards
* posters/ hand signals
* unfinished homework stamp
* class numbers (something that I was totally against before him)
Check out his site here, and if you ever have the chance to see him, I would highly recommend him. I also have all of his books which are an absolute treasure.
I'm off to prepare for our first day of testing. Eeeek :{

Monday, April 27, 2009

You're a daisy


Hi friends,
This i
s a card I made for a friend's birthday. I made a boo-boo when I was cutting out my spellbinder die & realized that it could become a cool frame. So I put foam tape behind one & layered it. So the lesson for today is: not all mistakes are terrible! I also decided to play with my new Cuttlebug embossing borders (luuuuv!). I thought this one went perfectly with my flowers.


Here's an up-close look at it:

Just a little bit closer:


Here is a close up pic of the flowers:


Here's the side profile: (not very bulky)

I hope she likes it -& you too :)
Now, it's time for me to get ready for State testing- gotta go!
Saturday, April 25, 2009

Papertrey Ink Blog Hop- April

Hi friends,
Today I'm excited to show you what I did for PTI's Blog Hop.

I was so excited when I saw this month's Blog Hop was to feature Lauren's Timeless Templates (luuuuuuv!) I've purchased most of them because they are truly easy to work with. (At the end of this post, I'll show you how I like to print & put them together.) On to the deets...
This Office desk Trio is for my uncle. He often brings home work to do so I thought I would make these as his birthday present to help him maximize organization of his everyday office supplies for his home office.

First up is a Personalized Note Tray (very much inspired by Nichole's) using "Desk Top Organizer." I used the Damask design because it is gender neutral. It is slightly glittered, but not over the top. I think it gives it elegance. I used a fleur-de-lis border punch to punch a border in vellum.

I also made 4 coordinating pens. I used the Pentel pens because you can unscrew the top & add your personalization to the barrel. I used the smaller pen (I think the RSVP can be bulky). Plus I bought these thinner pens at the 99c store (5 for $1)-much cheaper! I hope you can see the difference in the pic.

Up next is a caddy using "From the Desk of."

I created an acetate compartment that divides the back pocket into thirds. This way, the bottom of the box won't be damaged by scissors, pencil/pen marks. (I'm a little type-A, I know!) Again, I used the border punch in vellum to accent the top of the box.

Finally, is the big daddy of the bunch. I used "File it with Flair" to make this organizer.

I included generic labels (bills, notes, outgoing, paid, to do, to be filed, etc) so he can personalize it to whatever his needs may be. Again, I punched a vellum border to accentuate the top of the organizer.

Now, this is how I prefer to print o
ut MTTs. I have put cardstock in my printer & it goes through alright. Of course, each time I would hold my breath hoping it wouldn't jam, print out unevenly, or bend/warp the cardstock. Too much stress! Well, what I REALLY DIDN'T like was having score lines show. I even lightened them, but you could still see them. I don't know about you, but I like it when someone can't figure out how I did it. When someone can see where the template is- it just looks like my kids can do it too. NOOO!!! I want to look like I'm a crafting engineer, even if I'm not :)

So I just print it on regular copy paper-no muss, no fuss. Then I line it up with my cardstock & staple it around places that I won't be using. Don't need to go crazy- just enough to hold it down. The staples hold it in place beautifully!


Then I simply cut it out. I try to cut in straight lines because then the paper tends not to shift at all. The scraps just fall away cleanly, in big pieces. ( I also use those scraps for other things.)


Then I just put it on my trimmer & score on the template and cardstock together. For me this is the BEST way I've tried.


I folded the papers back so you can see how well it scores through both. I use the Martha Stewart bone folder because it has very pointy tips & edges so your score lines are crisp & clean.


I use Scor-Tape to adhere it together. It sticks to the paper- not to you! I hope you found this helpful & you liked my projects today.

I'm off to meet Eric Carle at the Festival of Books at UCLA today. YAAY! So excited :)
He'll be signing copies of t
he anniversary edition of The Very Hungry Caterpillar. Don't know who he is? Ask any teacher or child anywhere! His books are wonderful!
Thanks for hopping by!


Friday, April 24, 2009

Thanks fairy much


Hi friends,
Oh my gosh golly! Isn't this stamp so super cute!!! Luuuuuv. The whole set is adorable. It's called Enchanted Lily & it's by Pink Cat Studio. I just picked it up a couple of days ago at my LSS. It was perfect for the Tilt technique! She swings back and forth. I'm reminding you that I'm not a colorista, but I really tried to color her as pretty as I could. I painted opal Shimmerz on her wings, but it just wasn't sparkly enough for me so I added crystal fine glitter- much better! I used my Sizzix grass die for the grass & sprinkled some flowers on it. I used my scallop scissors to free hand the clouds. Every time I passed by my craft table I had to pick it up & play with her!!! I'm such a little kid sometimes :) Well, I hope you like it too! It's time for Math class--gotta go!

Thursday, April 23, 2009

Acrylic Post-it Holder

Hi friends,
I made this Post-it holder for my grandma. Every time I call or visit her, she's looking for a piece of paper to write things down. So I made this for that purpose & to showcase little
Carlitos, her cockatiel. She adores him. He is a very sweet-natured bird, I must say. He will climb right onto your finger without hissing or trying to bite you.
This is super easy to make- and an inexpensive gift option too. I bought the acrylic frame for $1. There's a tutorial on SCS here, but I decided to be lazy and not do any stamping or coloring. I cut the lace paper to
fit the frame. Cut out a piece to sit along the right edge. I did rub my Stazon Mustard ink along all 4 edges. I printed, cropped, & matted Carlitos' picture. I added a little bit of bling on certain places. It's an under 10 minute project- truly.
Here's a picture of the back.

I can't wait to show you what I making for her birthday! It's totally inspired by Lauren's Timeless Templates. I'm off to a meeting-- gotta go!
Wednesday, April 22, 2009

God's Beauty


Hi friends,
In honor of Earth Day, I wanted to share this card with you. I stamped the butterfly twice, colored both, cut 1 out, & layered it on top of each other. The wings are folded up so it looks like it's flying. I also sprinkled a little Flower Soft over the blades of grass. And of course, added Dew Drops. Love those little things :)

I love butterflies! They're beautiful & amazing creatures. When I taught 2nd grade, we raised them as part of the animal life cycles unit. It was such a treat to see them go through their stages of metamorphosis and then release them to live the rest of their lives flying free. I'll leave you with one of my favorite butterfly quotes: "What a caterpillar calls the end- God calls a butterfly"
Take time today to enjoy the everyday beauty around you.

Tuesday, April 21, 2009

Teacher Tuesday

Hi friends,
I'm calling all my teacher friends today. I wanted to share a really fabulous site I have visited many times. You will find a WEALTH of resources especially for Reading/Language Arts. If you use the Houghton Mifflin Reading Program, you will be one happy teacher. On the side bar click "_____ grade sharing" for your grade level. If you're moving to a new grade level, you'll be glad to have this site as a resource. Grab some coffee and have an extra ink cartridge handy! Here it is for your viewing pleasure! I'm off to make copies-- gotta go.

Monday, April 20, 2009

Ms. Sheriff


I made this card for the MFT Challenge MFTSC77. I am
not a Colorista (as I like to call those who are amazing with the markers), so please be kind :) I would love to take a Copic Certification class & learn how to color beautifully. I didn't use copics on this card, I used my Prismas. The background is chalked- super easy technique. I love this stamp set & many things from MFT Stamps. I extended the little cactus into this tall Saguaro so that it would take up the space in all three squares. (I know, very sneaky, right! Tee! Hee!)
Today is my first day back from a wonderful Spring break (insert tears here). Don't get me wrong, I feel very fortunate to have a job to go to in these times. We're getting ready for State Testing & that is not my favorite time of the year. Time to get my classroom ready to welcome back my kiddos--gotta go!
Sunday, April 19, 2009

Sundays are for Sharing


Hi friends,
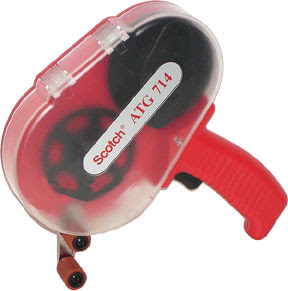
I love, love, love-- did I mention LOVE my ATG gun! So smooth & easy to use, way cheaper adhesive than just about anything else. Light & hard to lose! But there is one teensy-weensy problem. LOADING IT!!! :( Rats! Almost perfect. It can be very confusing. Well, today I want to share a great video I came across that shows step by step how to load it quick & easy. As many times as I have refilled it, I find myself watching it - at least the winding up part :) (Thanks, Melissa!) I'm off to read- so grab your ATG gun & watch this :)

Saturday, April 18, 2009

Baby Armoire Pop up Card

Hi Friends,
I have the cutest baby card to share with you today. I love interactive cards. This one is quite easy to do. It's made with a te
mplate. You see two onesies hanging on the hangers (brads) because this card is going to a friend who had twin boys.


This is a little teaser of the inside, so let me show you other peeks too :)


Here's the inside open to show you both sides of the armoire doors.
Don't the animals look like toys on the shelf? The top drawer is the one that pops up. The bottom drawers are adhered with foam tape to give them dimension.

Here's the card closed. I used photo turns as closures.
This card really is quite easy to put together. This is the first card I've made with this template and other ideas for this template are spinning in my head! I also bought another template so I'll be posting a card for that one soon... so stay tuned!

The card fits beautifully in an envelope for a 6 1/2 x 5 card. Mailing: It has a fairly low profile when closed- but that depends on how you embellish it. I don't think it will be too much of a problem mailing it.

So you want one yourself, huh? Well, you can buy the template here. If you make a card yourself with this template, would you send me a link? I would love to see what you creative people do with it!

Friday, April 17, 2009

Flower Pot Card

Hi friends,
I love these cute flower pot cards. They are super easy to make. There's a tutorial for these cards here. I used Prima flowers, bee sticker, & garden ribbon I've had forever and hadn't opened yet. On the inside card, I had all of my students sign their names & tucked a gift card for my parent helper. She has helped chaperone all three field trips this year & all field trips for the past 3 years! She's a keeper :)
It's lunch time-- gotta go!

Thursday, April 16, 2009

A Rose is ...

...so pretty.
Hi friends,
I actually bought this stamp a long time ago on E-bay as an "SU! stamp" but it wasn't. I kept it because I thought it was a beautiful stamp nonetheless. Well, I've tried to use it a couple of times but just couldn't make it work. When I saw this week's challenge on SCS (SC224) this stamp called my name. I stamped it with Pretty in Pink on Pink Pirouette paper. I then highlighted areas with my Pearlescent Shimmer Chalks so that some areas are subtly shimmery - very pretty IRL. I cut the ribbon tag trio twice- on vanilla cardstock & vellum. I layered the two & I love the way it makes the sentiment soft. I stamped the 2 underlying panels with the rose leaf stamp & the card base in En Français with Mellow Moss. Hope you like it :) Time for recess- gotta go!

The Deets:
Stamps: God's Beauty, short & sweet, en français, main image unknown
Paper: Mellow Moss, vanilla, pink pirouette
Tools: ribbon labels trio Nesties
Other: Pearlescent Shimmer chalks (Pebbles, inc)
Ink:

Wednesday, April 15, 2009

It's Game Night

Hi friends,
I made this card for the MOJO Monday Sketch Challenge MOJO82. It came together pretty quickly. The little playing cards are popped on each other with foam tape. The little dies are just hangin' on the twine. The punched borders at the bottom match perfectly! Time for recess--gotta go!

The Deets:
Cardstock: SU! Riding Hood Red, So Safron, Black, Vanilla
Paper: Jackpot DSP
Ink: Black
Stamps: Game Night, Card Games
Tools: EK Sucess border punch, Square Nesties
Other: black twine, white signo pen
Blog Widget by LinkWithin