Hi friends,Thanks so much for your comments on my little mini cake in a box project! I'm so tickled you like it :) Today I have the tutorial for ya:
Here's what we'll be cookin' up: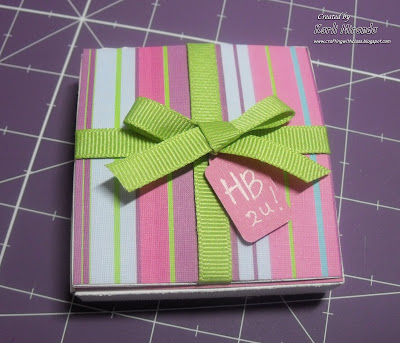
 I will show you the speedy quick way I did it (just for you Paige :) and the one that takes longer (but you get some good options with that one.)So let's get on with the deets...It's a simple 3 step process:Step 1: Create the BoxStep 2: Create the CakeStep 3: Pop it in the box & close itVersion 1: "I have the Sizzix Shaker Box Die"You'll need:
Sizzix Shaker Box DieStrong adhesive like Scor-Tape or Sticky Strip. You can also use wet glue.
Scoring toolScissorsCardstock/Pattern Paper of your choice
Step 1: Create the Box:
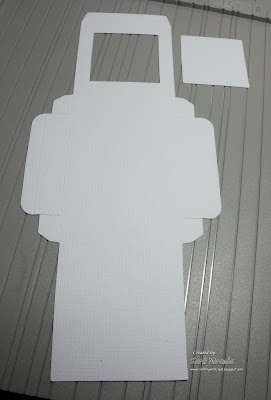
Die cut the box. You'll have a square left over, but keep it. We're going to use it.
 While it's flat, you may want to decorate your box however you'd like.
Add adhesive to the box as shown & assemble. (I'm using Sticky Strip so you can see it, but I do prefer Scor-Tape.) Now is the time to add the acetate square 2 3/4" (squared)
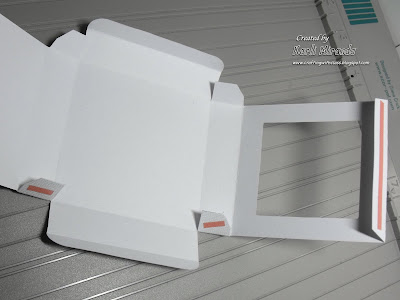 Assemble it & set it aside. (See, we're almost done! ;)
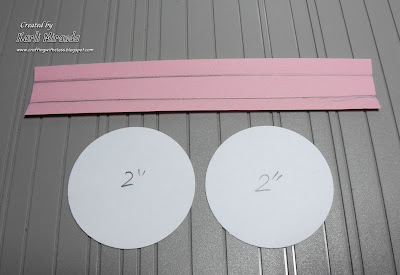
Step 2: Create the Cake:Punch out two 2" circles & a strip 1" x 6 1/2" from cardstock/ Pattern Paper.
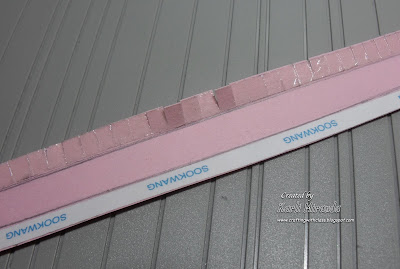
Score the strip along the 1" side at 1/4" on two sides. (TIP: I score at 3/4" flip it & score at 3/4" so I don't have to struggle trying to work with 1/4")
 Add strong adhesive to the 1/4" tabs. Score & fold so that it looks like a bar of staples.
 Remove liner. Cut little slits all the way along up to the score line. (Non-stick snips work great for this part.)
 Do that to both sides.
 Remember to remove liner before cutting otherwise you'll be removing bitty pieces of liner---->Good luck with that!)Optional (You can also do the opposite- cut your slits first & add one long line of adhesive. IMO, the little tabs seem to find their way better when you add adhesive before cutting- but both ways work.)
Start wrapping the little tabs to the circle all the way around. Take your time the first time. Once you've done these a couple of times this part will be quick (really Paige ;)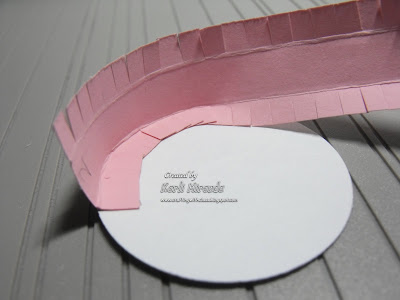
 When complete it should look like this: Trim any excess.
 Then all I do is place the other circle on top & carefully tap it in place.
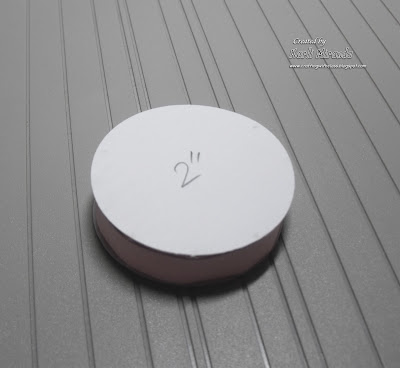 Let them eat cake!--- 'cause it's DONE! Here I added a strip of 6 1/2" x 1/2" strip of paper around it to finish it. You can also wrap 1/2" width ribbon around it.
 Now the fun part... decorate as you wish! Remember not to add too many embellies or your lid won't close flat!
More Options:For a square cake
Punch two 1 3/4" squares & a strip 1" x 7 1/4".
 The rest is the same process as the other cake, but easier because you're dealing with straight sides & not curves. (So you may want to try the first cake as a square.) When you get to the corners, I just pinched the side & continued. Trim any excess. Pop your other square on top.
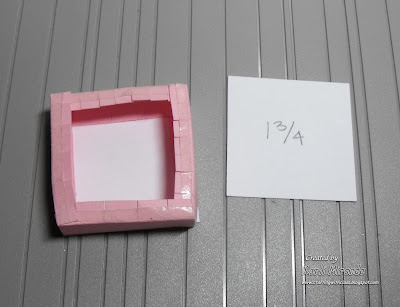 It will look like this when complete:
 In the box:
 So there you go 2 cake options :) But really, you can make any shape as long as it fits in the box.
Cake Liner (Optional): Cut a 3" square piece of vellum (cake liner). You can use a border punch or decorative scissors to create a pretty border. Do that to all sides until complete. If you don't want a decorative border, cut the vellum to 2 1/2" squared. Adhere the left over square underneath the vellum. This will give a sturdy little place for your cake to sit on.
 Now just adhere the cake to the liner
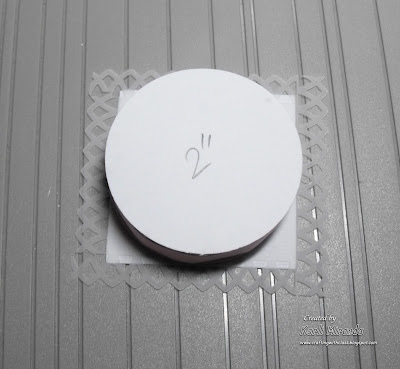 Pop your cake in! That's it-- stick a fork in it blah, blah, blah...
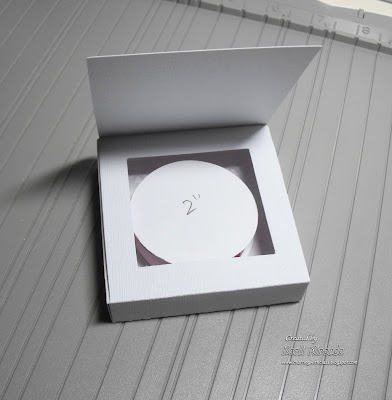 Here it is all happy!
 Don't forget to add a 2 3/4" acetate square to the underside of the opening before you assemble it! I added a removable glue dot to the lid so it stays closed, but can be opened easily. I created another way to close it, but I'll share that with a different project ;)
Version 2: " I don't have this die Wah! Wah!"
If you don't have this die, don't cry. I've created a template for you. It's not exactly as the Sizzix, but it's pretty darn close. Now, this will take much longer to do, but I'll show you why it may be a good thing.
Start with a sheet of CS 4 7/8" x 10 3/4"
On the 5" side, score 3/8", 1", 3 7/8", and 4 1/2"
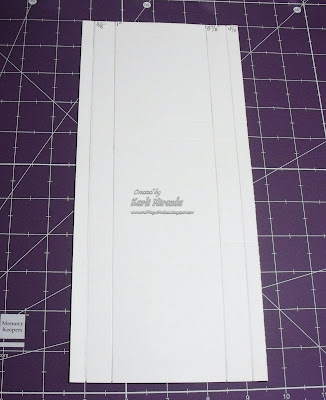
 On the 11" side, score 3", 3 5/8", 6 5/8", 7 1/4", and 10 1/4"
 Cut out where I've marked with red Xs.
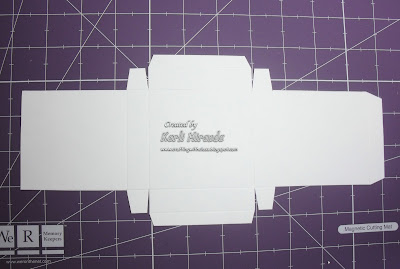
 When complete it should look like this. Trim tabs as shown:
 Now for the part that makes this a good alternative to the die:
You can make the cut out ANYTHING you'd like! If you want about the same square size as the Sizzix one, I used the 4th Square of the Large Square Nestabilities. You can also use punches or dies you may have. (Remember you'll need to leave at least 3/8" space on all sides.)
 I used this balloon punch, but forgot that when I flipped the lid closed, it flipped the image---so my balloon was upside down! Duh! Just remember that when you do yours!Remember, now that you know how to make this shaker box, you can fill it with all kinds of goodies & even change it up a bit in a fun way (which I'll be sharing with you---> later, Bwaaa! Haaa! Haaaaa!Thanks so much for sharing some cake with me :) & would love to hear what you think of "my recipe!" I'm off to well... you know---> school junk---gotta go!


 (Sorry, I took these pics at night so the colors are not the greatest.) Truth be told, it's cute, but...I'm not in love. It's really small & it was quite a bit of work. Maybe it's just me. Maybe it's because it was my first time making one. If you have any tricks or pointers on how to make it better I'd LOVE to hear it! I don't want to toss it in the round file (trash can) yet :) I don't mean to complain or sound critical, b/c I LUUUV SCS & their tutorials rock. I'm a Fan Club member after all! (Oh, I hope they don't kick me out of the club for complaining :{
 I filled it with what a teacher will find handy at the beginning of the year---> A Burt's Bees lip balm, cough drops, and less than 1/2 a pad of stickies for the small front pocket (I also stuffed a travel size tube of Tylenol). I stuffed it all the way to the top! You can find the tutorial on SCS here. BTW, Step 21 is repeated twice just so you know. I didn't notice right away & it threw me off for a minute.