skip to main |
skip to sidebar
Hi friends,
Today I have a tut for creating my mummy guy with gauze. He takes more work than Frankie, but he's worth it! Luuuv using gauze. It gives him an authentic look. So how about we wrap up the blabber & get on with the deets!
Here's what we'll be making today: Here's what you'll need:
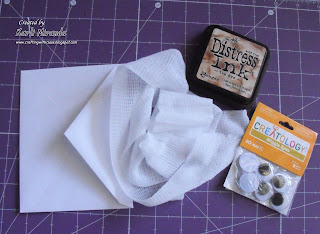
(
1) standard size (A2) envelope
4" x 5" cardstock for insert notecard
about 38" (or more) of rolled gauze (bought at $1 store)
(2) 20mm wiggle eyes
Ink (I used Tim Holtz Tea Dye Distress Ink) but most brown inks will work
Tape runnerNOTE: Your fingers will get a bit inky doing this project. So you may not want to work on this project in your Couture white cashmere sweater. Just sayin'!First, seal the envelope. Then, trim about 1/2" from the top as shown. Discard trimmed piece. Rub the ink pad across the gauze. I hold the gauze in one hand & rub the ink pad across it. The gauze will cling slightly to the pad, but it won't damage it. Distress as much as you'd like. (I just distressed a little.)
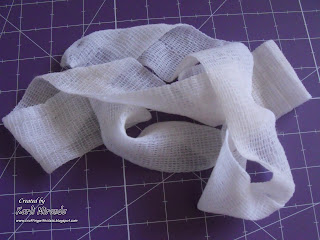 I know it's hard to tell, but it's distressed (a bit). My mummy's not that old, OK!Add adhesive (tape runner) to both sides of the envelope. You don't want to use strong adhesive because you're going to need to be able to adjust the gauze. Tape runner works well. I don't recommend using wet glue. (sorry, I know it's hard to tell in the photo :( there are 4 vertical lines of adhesive. (click to enlarge the pic if you need to)
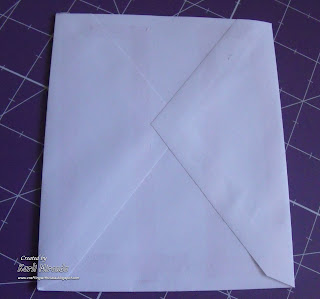 Now start wrapping the gauze around the entire envelope. You want to cross it, the less "perfect" the better it will look. Just keep playing with it until you get it looking how you like it. (No 2 mummies will be exactly the same, but like my friend Martha always says---> it's a good thing :)
 Once you're done wrapping it, add the eyes. Again play with it. Depending on where and how you place the eyes, your mummy will have a different look.
 Here are some of those "mummy looks":"Surprised/Shocked" Mummy:
 "Mad" Mummy:
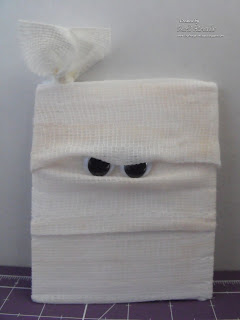 "I've got a secret" Mummy:
 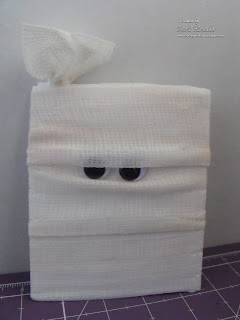 (He told the secret to the first mummy & shocked him and made the second mummy mad!) Tee! Hee!
Anyhoo, you get the idea, right? PLAY!!!
Now, take your 4"x5" insert piece & decorate it (not like mine, better. WAAAAY better). Punch a hole at the top left. Then take a left over piece or extra scrap of gauze & thread one end through the hole & tie a knot.
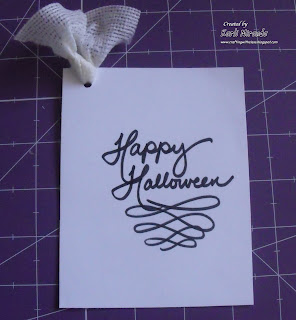 All that's left if to tuck the card inside the envelope! Ta dah! This tut is all wrapped up!
 (sorry, that's my last bad pun, pinky promise!)
You can take your ink pad & carefully rub it along the sides to age it some more if you'd like :)"Step on a thing & that thing bends, and that's they way this tutorial ends!"Thanks for peekin' at my Mummy guy today! Are you sick of my tuts yet? I hope not, 'cause I've got one more on it's way tomorrow~~~> Gotta Go!
Hi friends,
Remember this card display I created with the goodies from YMH? Well, I was so tickled that many of you asked me to share the deets of how I created it! So today, I have the tutorial to share with ya. Here's what we'll be making today!
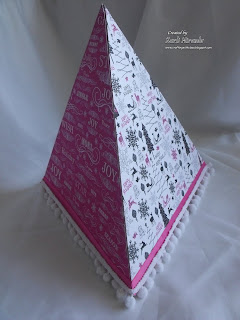 This paper is so pretty- loads of sparkle! When you use pretty paper like this, it makes the process faster- let it do all the work! I also like the fact that it's non-traditional Christmas colors. So let's get on with the deets shall we...Here's what you'll need:
3 sheets 12"x12" cardstock (nice heavyweight is better)
ribbon
strong adhesive (I used Scor-tape)
bone folder
cutting mat, exact-o knife, ruler
clips & clipper tool
Take your cardstock & make a mark at 6" (the half-way point)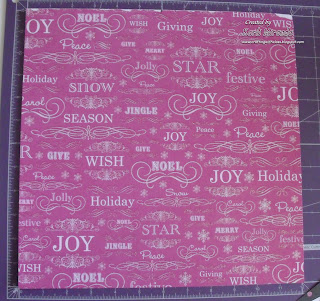
up close
 Do the same with the other 2 cardstock sheets.
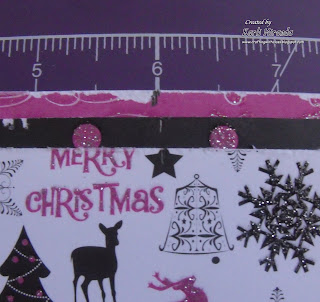 Line up the ruler with the mark you made at the top center with the bottom corner of the paper and Score.
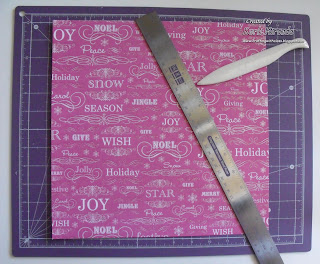 Move the ruler about 1/2" over to the right & Cut with blade.
 It should look like this:
 Do the same thing to the other side. Line up the ruler with the top mark with the bottom corner & score.
 Move the ruler 1/2" over to the left and cut.With both sides done, it should look like this:
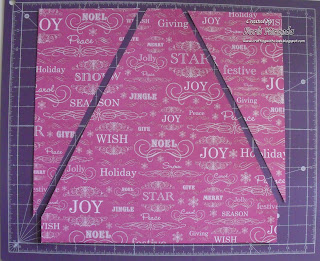 Here's what the top of the cardstock will look like:
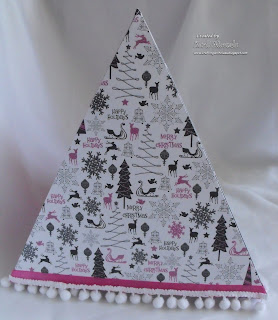
 Do the same thing to the other sheets of Cardstock so they look like this:
 Now fold your score lines on all three sheets for ease of assembly.
 Add adhesive as shown: On sheet #1 (pink), add adhesive to both flaps, on sheet #2 (white) add adhesive to ONE flap , on sheet #3 (black) add adhesive to ONE flap (opposite flap of sheet #2).
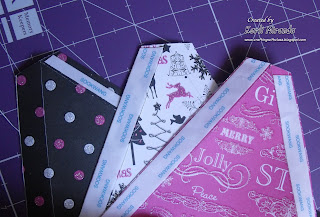 I see a hand up. Why not add adhesive to all flaps? Ahh, good question, friend. Well, because I want to be able to store it FLAT. But if you're not concerned about storage then just add adhesive to all flaps. But if you want to be able to store it flat (to use next year) follow me!
Now remove the adhesive from both the pink & white papers & adhere together making sure the edges are flushed & even.
back view:
 front view
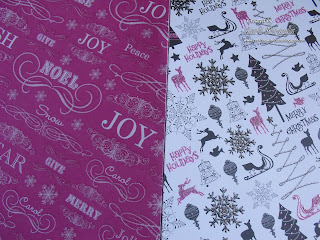
Now add your last sheet. There should be NO adhesive on the remaining 2 flaps.
back view: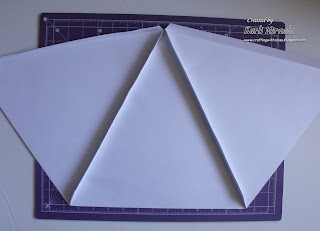
front view:
 Now, here's how we're going to make this collapsible.Fold your flaps like you would if you were going to adhere it. NOTE: You will probably need to trim the top of the other two inside flaps so that you can close your display. Simply trim at an angle. Then, I used my clipper tool to help me clip the flaps together tightly but without having to adhere them. Just put the flaps into the tool & press down on the handle. It will attach the clippie easy peasy.
 Do that all the way across the flap to the top.
 Stick a fork in it~~~> it's done! Here are some side views: (Here's where you can ink the edges if you'd like)
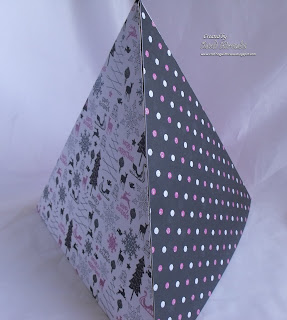
 Here's how it folds flat: I unclipped the clippies from the inside & clipped them on the outside to hold it closed- and that way you'll always know where they are when you're ready to use it again :) Double-duty, I like! I like!
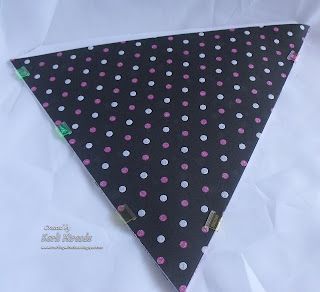 side view: I'm holding it with one finger! Super slim, like me :) NOT!!!
 Here's how I dressed it up a bit. I added this satin pink ribbon & added the snowball trim. It adds a really fun look, don't ya think? I would have loved to use the Pebbles ribbon like I did on the other display I made, but I didn't have pink, black, or white. :( Luuuv that ribbon!
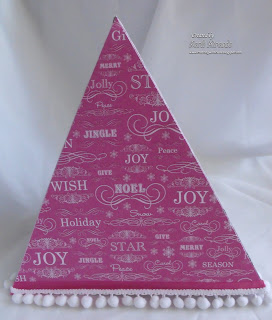
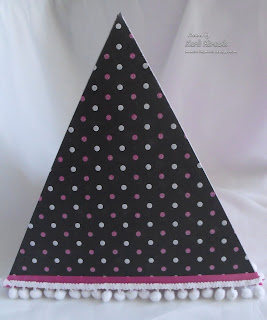
 The display stands on the little snowballs- cool, eh!And even with all those fun snowballs, it still folds flat.
 But wait... I'm not done yet! Well, this tutorial is done, but I'M not done adding all the embellies I want to add to it. I'm adding a sparkly white, pink, & black snowflake topper I'm creating with my Cricut & adding some clippies to the display to attach my cards.
This is a simple project to create so I hope you give it a try!
If you're interested, the clipper tool & clips can be found here at YMH Store for only $1.99 that includes 50 clippies & the tool too!
Thank you so much for requesting this tutorial & I hope I was able to explain it well for you. I'm off finish it up. I'll post a pic of the final finished project---Gotta go!The 411Paper: Glittered Christmas Stack -DCWV
Tools: Clipper Tool - Around the Block
Other: Ribbon- Michaels


 I know it's hard to tell, but it's distressed (a bit). My mummy's not that old, OK!

 Here are some of those "mummy looks":

 (He told the secret to the first mummy & shocked him and made the second mummy mad!) Tee! Hee!

 (sorry, that's my last bad pun, pinky promise!)