Wednesday, March 30, 2011

Cardabilities DT Reveal Sketch #28

Hi ya friends,
We've come to the end of yet another month (sheesh, is this year flying by or is it just me???), but that means it's time for a brand spankin' new fab Cardabilities Sketch! It is also a bittersweet reveal since many of our wonderful DT members are at the end of their term :( and this will be their last sketch reveal with Cardabilities
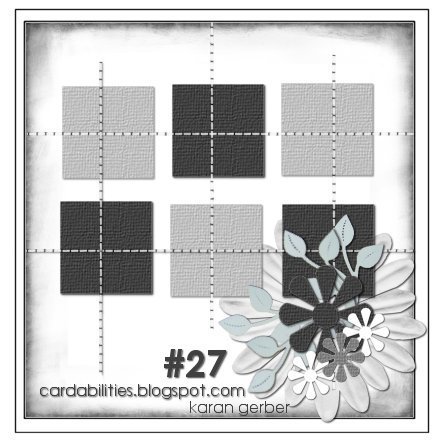
Here's Karan's sketch for ya:
Here's my card:


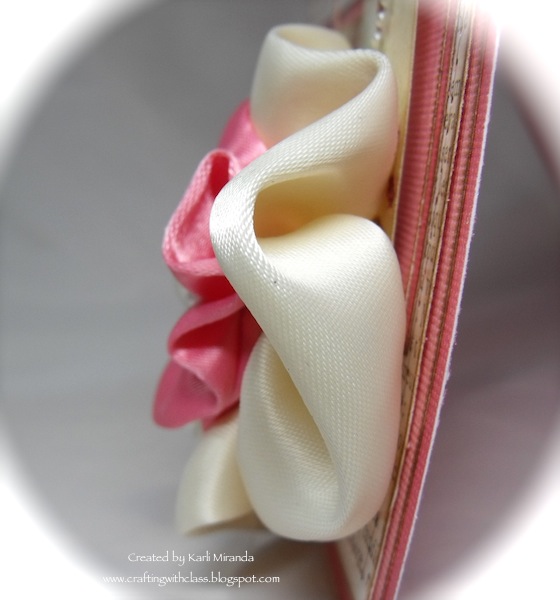
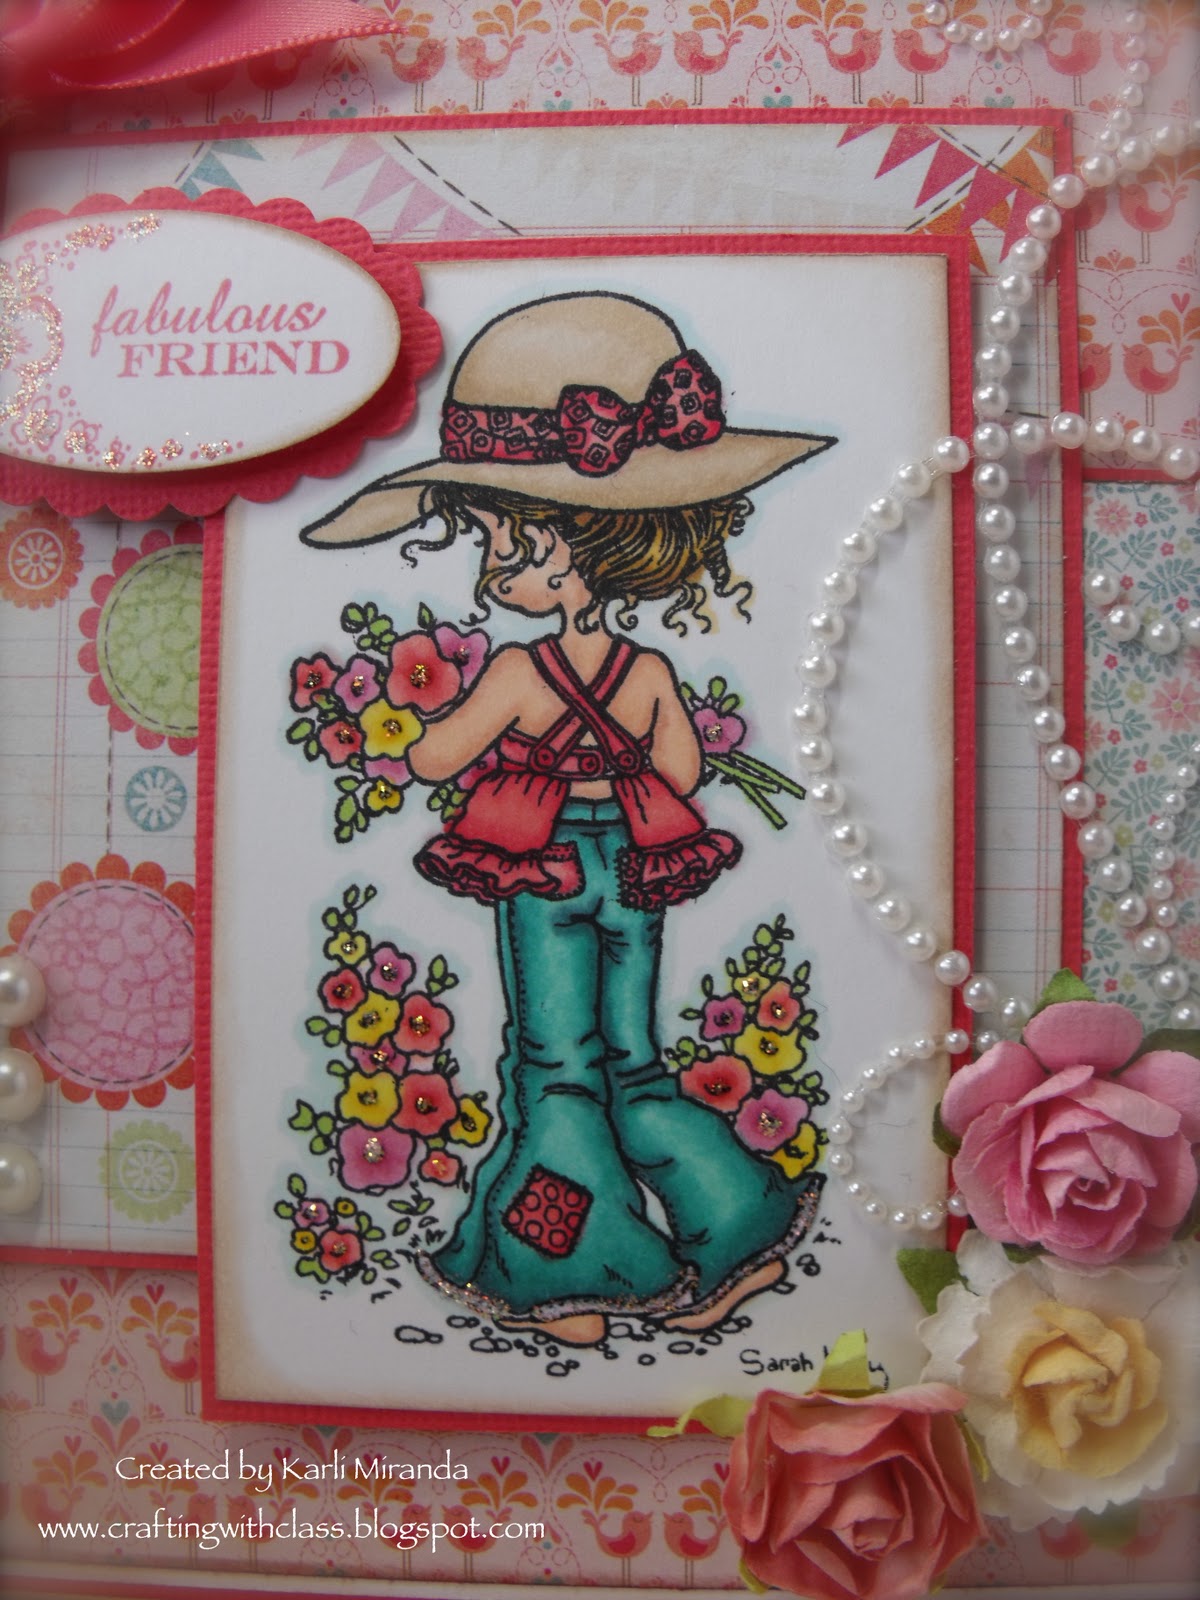
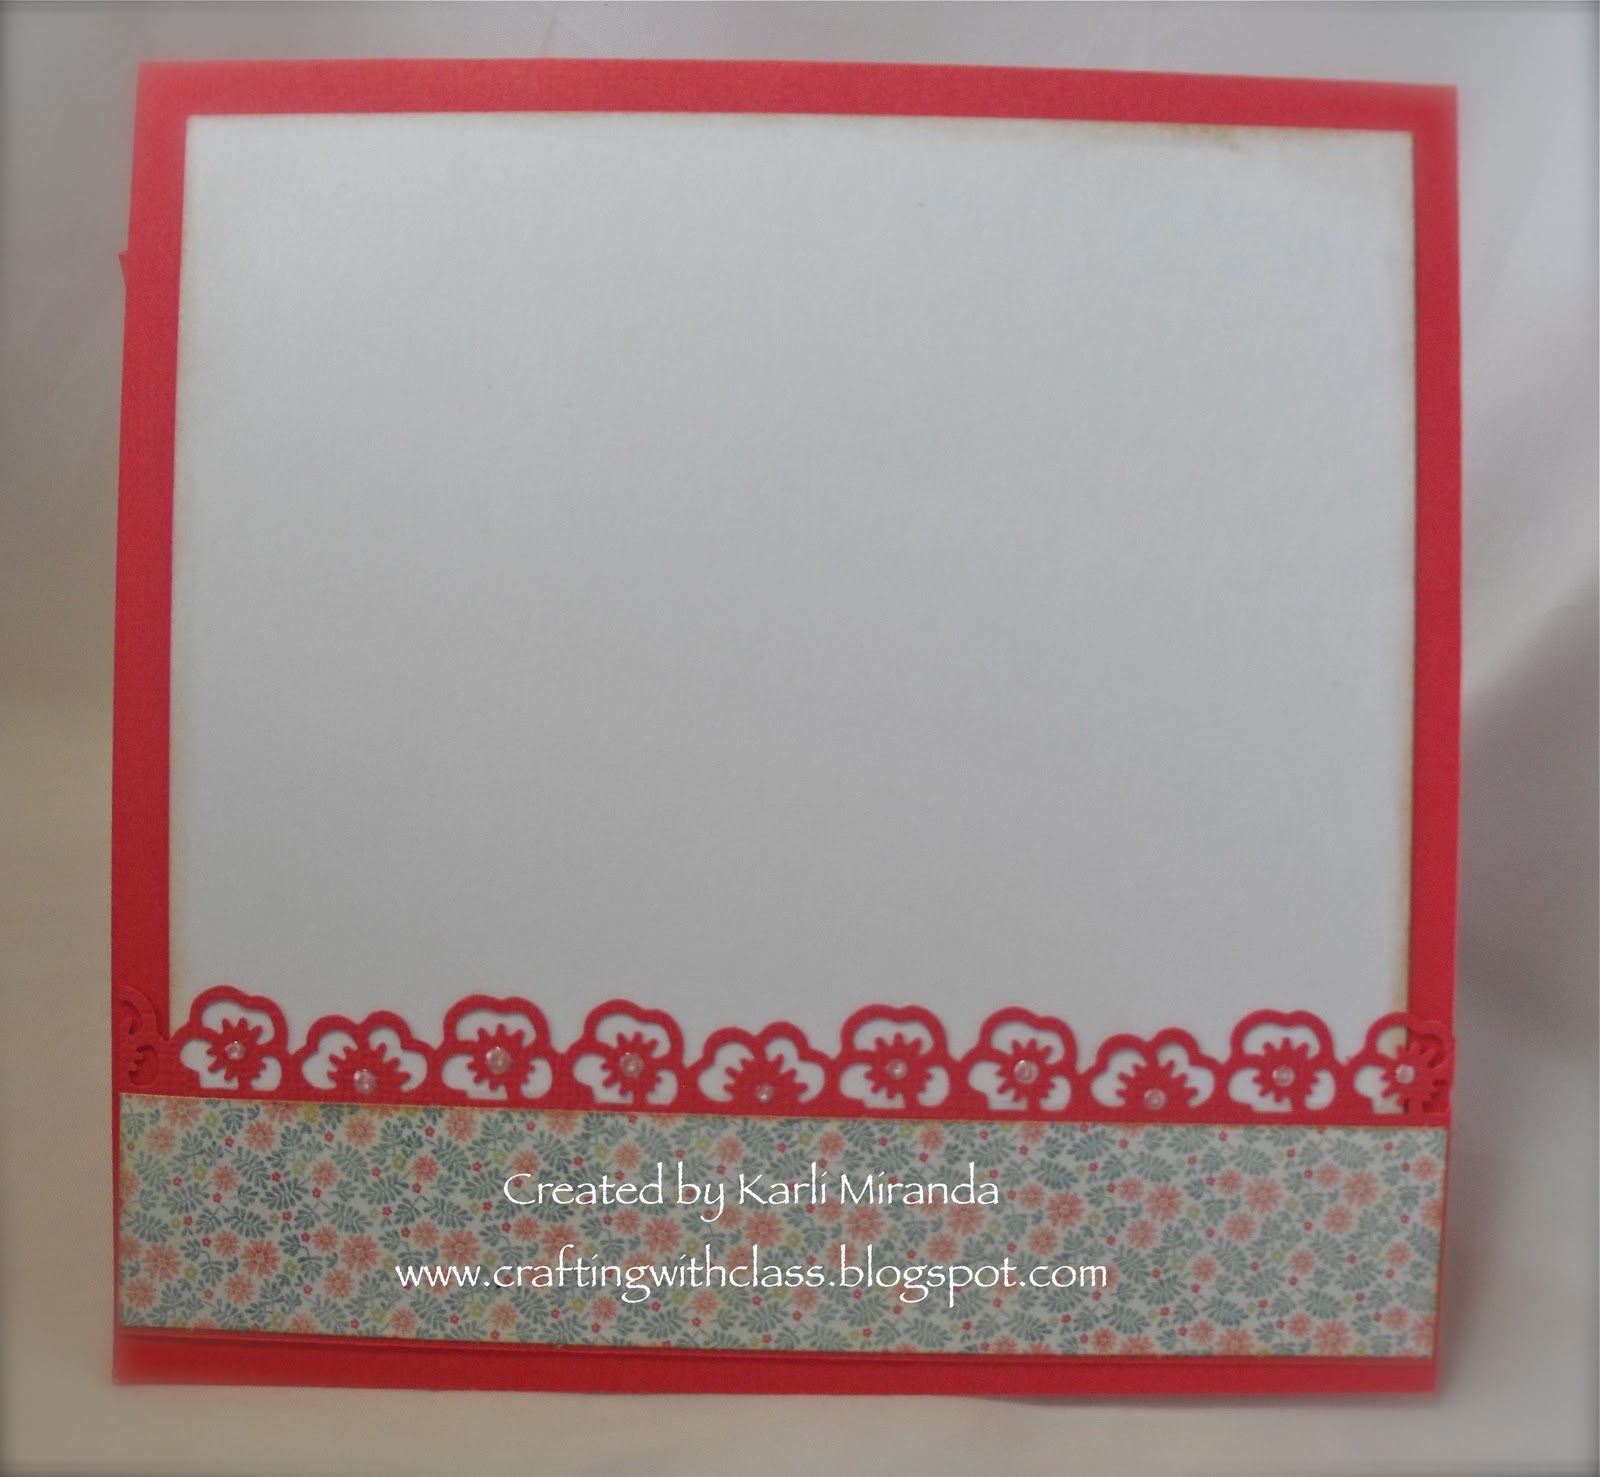
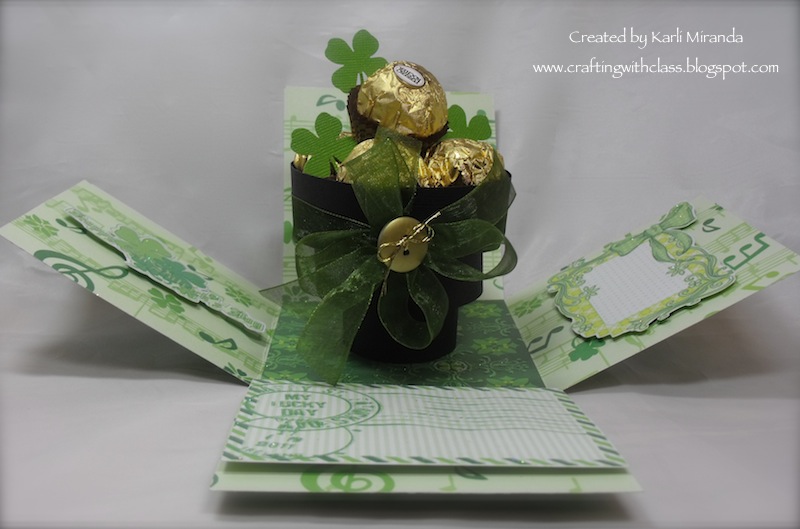
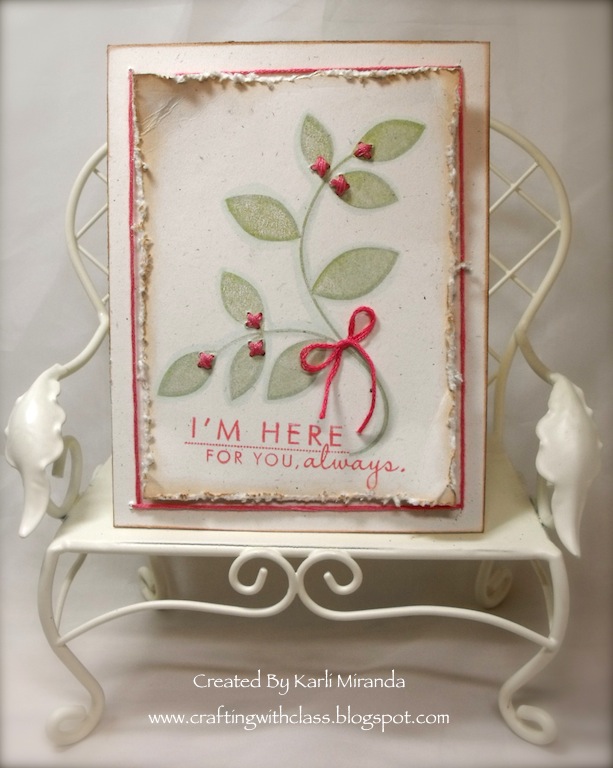
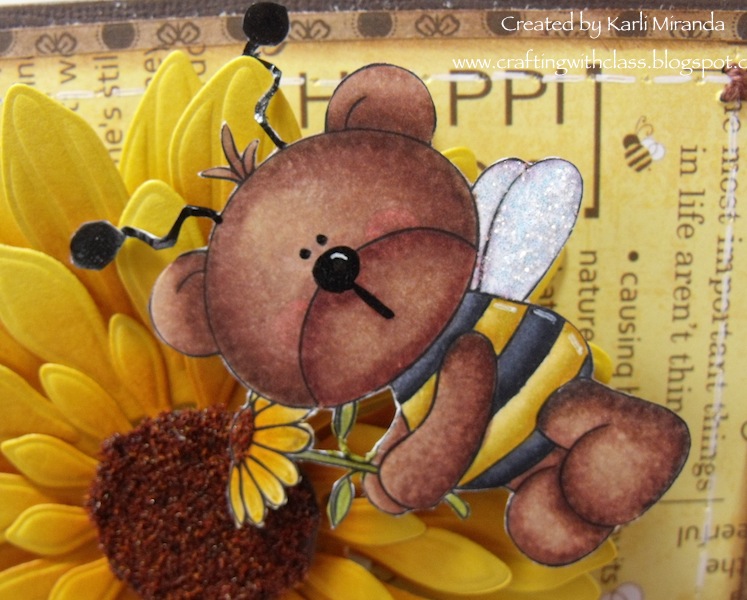
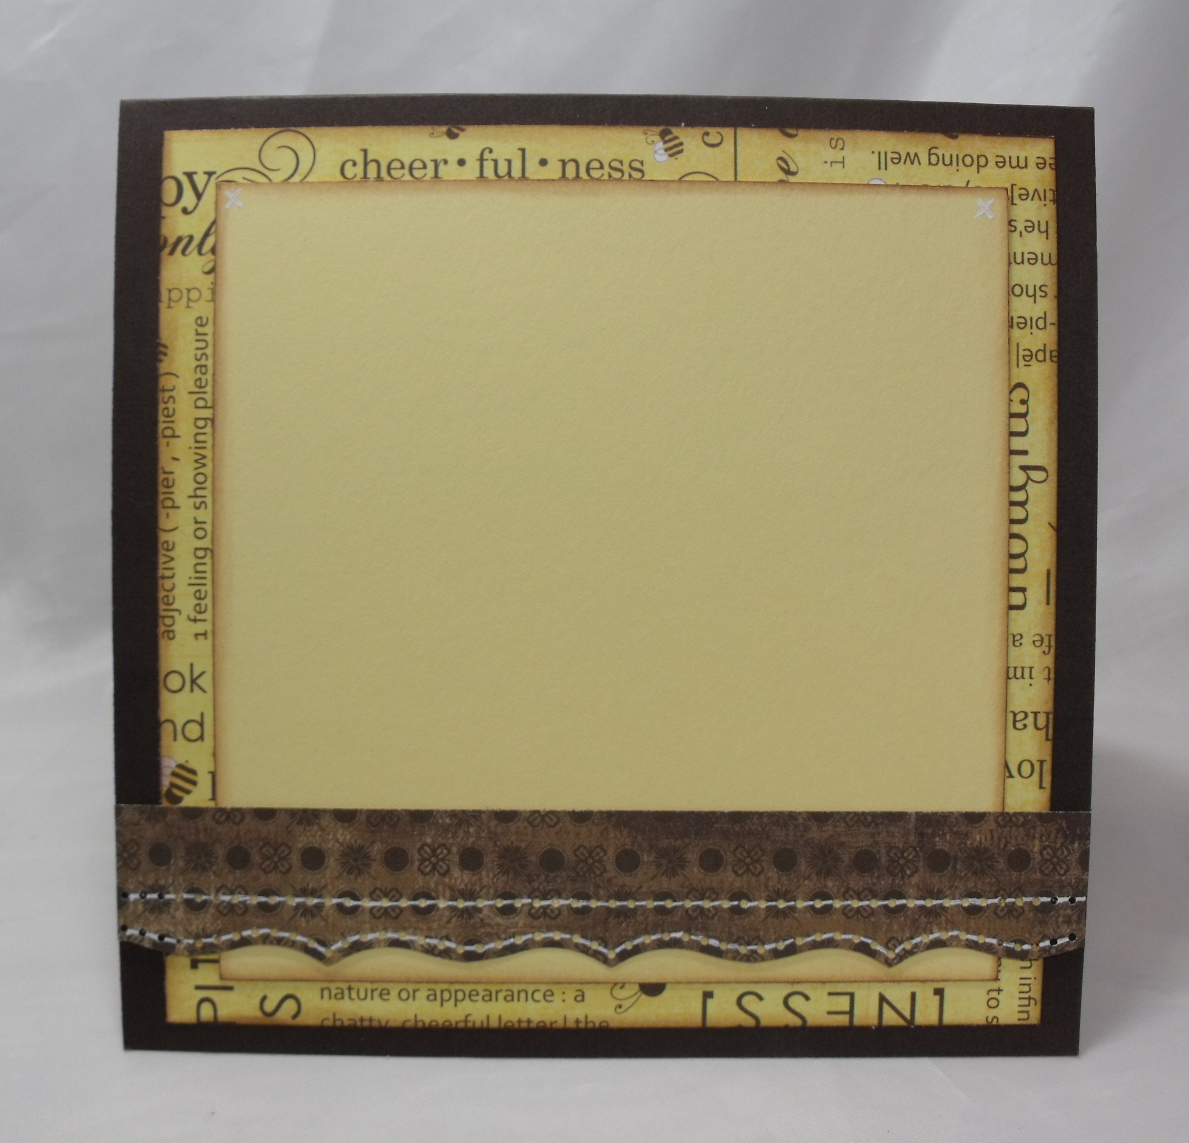
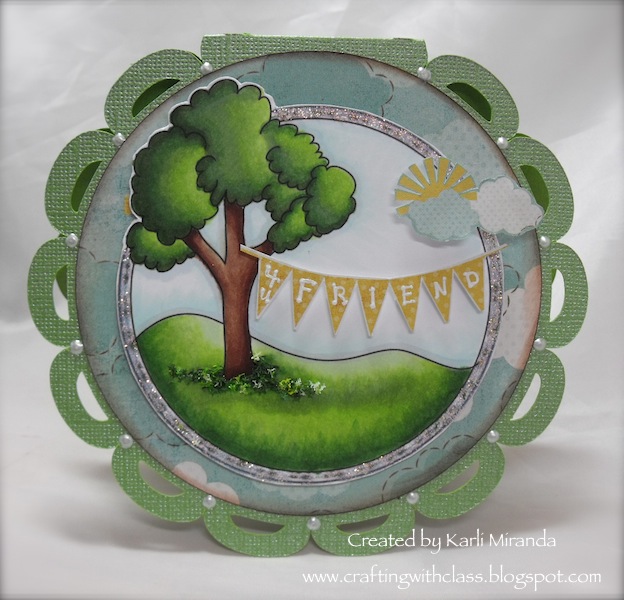
Oh, how I had to restrain myself from using gears! But I love the clean, openness of the sketch. I call this my "Frankenstein" card cuz I used left over bits & pieces of paper from other cards to give this one "life." I made rolled roses which are super easy-peasy to make, (if you've never made them before.) No dies, just cutting of a circle. The swirl along the edge are Sizzix dies which I added little drops of pearls with my Viva Decor Paper pen ;) The border is a MS punch. It's hard to tell, but the sentiment is tucked below the roses.
Here's a closer peek:

So... are you ready to show us your cardabilities??? Be sure to Linky your card creation to the Cardabilities blog by the 14th of April. Please be sure to check out the awesome cards our talented DT girlz have created to sketchspire ya! We would love it if you could also show our retiring DT members some luuuv by leaving some kind words for them :) Thank you!

Thank you so much for peeking, my friends! I'm so tickled you chose to spend a bit of your day taking a looksie at what I've got to share. I really appreciate you :)
Hope you have a great crafternoon today!
Hugs~


ETA: You can find a tut on making the Rolled Flowers on SCS---> Here.

Tuesday, March 29, 2011

Creative Card Crew Challenge: For a Child

Hi friends,
I'm back with a brand new challenge for Creative Card Crew. This week, the challenge theme is "For a Child."
Here's my card:
This is a new digi stamp for me from La La Land Crafts called Dress-Up Marcy. At first, I wasn't really into these, but my friend carries them in her store, so I bought one to try. I have to admit it was really fun coloring her :) I mean she's adorable with that big hat, over-sized pearls, sporting Momma's shoes! I think every little girl has to play dress up with their Mommie's shoes :) ---> I did! My mom had these ridiculously tall high heel shoes that I nearly killed myself on, but i just had to try walking around in them!

Here's a closer peek:
She's colored with Copics & her shoes have Cotton Candy Stickles on them. I know the glittery shoes would be the ones I'd want to sprain my ankle on!
Ok, so I went a little insano with the Viva Decor paper pen ;), but it's for a girl so it has to be a little dramatic & over the top, right? Ugh, I'll step away from the Viva pen next time ;)

Our sponsor this week is Stitchy Bear Stamps. They're offering up a fabbie prize for a lucky participant, but you can't win if you don't play along! So be sure to Linky your card to the Creative Card Crew blog by Monday night.

Speaking of challenges... this card meets the following challenges:
Cute Card Thursday- Sketch by Deb #157
Incy Wincy- Sparkle & Shine
Paper Playtime- Anything Goes
Simon Says Stamp & Show- a hat
Crafty Creations- In stitches

Thanks so much for peeking today. I've got several reveals for ya this week, so I hope you can come back & take a peek!
Hasta la bye-bye~


The 411
Copic Recipe: Skin E000, E00, E11, R20   Hair E25, E59, E53, E49  Clothes & Hat RV10, RV13, RV14, R20, R22, R24
Stamps: Dress Up Marcy- La La Land Crafts (Digi)
Ink: Chestnut Roan- Colorbox
Paper: Bazzill cs, Chanteuse collection- KaiserCraft
Tools: Nesties
Other: button-PTI, flower- Prima, ribbon- Offray, Viva Decor Paper Pen, White Signo gel pen

Sunday, March 27, 2011

Mini Me Princess

Hello friends,
This was a crazy busy weekend for me, as we celebrated my (not so) little one's birthday.
We took all his friends to the movies to watch "Diary of a Wimpy Kid 2." It was hilarious!!! I think I was laughing harder than the kids ;) next, we went to play games at the PowerStation, and then we headed back to our house for some pizza, cake, & ice cream. The kids had a blast & I was exhausted!

I got a bit of me time today & created this card:
I hadn't inked up this Maggie in a while & the background stamp hadn't seen ink at all, I don't think! They're colored with Copics. The clouds in the background are glittered as is the trim on her dress.
Here's a closer peek:
It looks like she needs some Head & Shoulders shampoo, but I can assure you she doesn't. It's some displaced glitter ;) I loved this stamp from day 1 cuz when I was a little girl, I thought I was Snow White---> and Wonder Woman. Yup, I totally rocked the aluminum foil bracelets! Hee! Hee! And I've dressed up as Snow White many a Halloween :)

This card meets a few challenges out in the blogosphere:
CPS Card Sketches- Sketch 211
Let's Ink It Up- Use Die Cuts/Punches (swirl is a die cut, grass is a punch)
Paper Sundaes- Photo Inspiration #62
Wee Memories- Anything Goes
Daring Cardmakers- Book Club
Stamp Something- Spring
Paper Pal Arts- Embossing
Make it Colorful- Coloring Backgrounds

Thanks so much for peeking today!
Hope your week is a wonderful one!
Gotta Go!


The 411
Stamps: Tilda with Apple, Spring Background- Magnolia, Everyday Button Bits- PTI
Ink: Memento Black, Chestnut Roan -colorbox
Paper: Terra Cotta Tile cs- PTI, red & green cs- Bazzill, More Mustard cs- SU, Neenah cs, Green glitter cs- DCWV
Tools: Flourish #9- Sizzix, butterfly & grass punch- MS, Once Upon A Princess CB Embossing Folder
Other: Copics, Stickles, Viva Decor Paper pen, button, white signo pen

Friday, March 25, 2011

Blog Hop PTI

Hi friends,
Today, I'm participating in PTI's Blog Hop!
The theme: Embroidery floss.
Here's my card:
This card is very CAS for me. I used the floss to create a border around the card front & to create the look of blooms on the leaves. The main image is from the set Turning a New Leaf on Rustic white cs stamped on Simply Chartreuse ink. The edges are distressed with my Tonic distressing tool.
Thanks for peeking today!
Gotta Go!

Wednesday, March 23, 2011

ABC Challenge: Q is for...

Quilting/Sewing!
Hello there friends!
Welcome to a brand new challenge from the ABC Challenge blog. This week's challenge is Q is for Quilting or sewing.
Here's my card:
 I faux stitched and real stitched on my card!  Faux on the edges & real on the corners(cross-stitch) and to form the stem of the flower. I used the We R Memory Keepers Sew Easy & let me tell you, it lives up to it's name! I likey that little tool ;) No fear that I'll sew my fingers together either! yesssss ;)

Here's a closer peek at the stitching:

The letter Q is brought to you by: Stamp Fairy
and they're offering a grand gift certificate to spend at their store!
I got to play with this cutie Lenny Bee image. As soon as I saw it, it reminded me of the Steiff Bears so that was my coloring inspiration.
Here's a pic of a Steiff bear:
After I colored it, I took a washcloth with blender solution & dabbed it over the image to give him the appearance of fur/texture. Here's a closer peek at that:
His wings are covered with Stickles for sparkle. The flower was cut with the Sunflower Nesties (layered with foam adhesive) and then I added Flower soft to the center (and on the flower in the image too).

Here's a peek of the innies: more stitching there
 Calling all quilters & those brave enough to sew- here's a challenge with your name all over it. Let's see your quilting or sewing skillz on your cards this week! You've got til Monday, March 28th to Linky your card creation to the ABC Challenge blog. Please be sure you check out the amazing cards the rest of the DT has created for ya!
Thanks so much for peeking today!
Gotta Go!


The 411:
Stamps: Lenny Bee 2- Stamp Fairy
Ink: Pumpkin Pie, More Mustard- SU, Chestnut Roan- Colorbox
Paper: Bee Happy Collection- Adornit Carolee's Creations, Bazzill cs, Barely Banana cs- SU
Tools: Sunflower Set 1 & 2- Spellbinders, Sew Easy- WeRMemory Keepers, Cherish Border punch- MS
Other: Copics, Ticket- Tim Holtz, ribbon, embroidery floss, Flower Soft, Stickles, sakura pen, Signo white gel pen

Tuesday, March 22, 2011

Guest Designer for Digital Delights

Hi ya friends,
I'm so tickled to have been asked to be this week's guest designer at Digital Delights! I have a card I created using the Tree Circular Background image.
Here's my card:

The Deets:
The image is colored with Copics: tree & grass: G99, YG67, YG63, YG03, G20 shadowed with C1 & highlighted with BG10. The card base was cut out on my Cricut (Wild Card Cartridge) with the help of my beloved Gypsy---> boy, do I luuuuv my Gypsy :) The I added Flower Soft to the base of the tree for accent.

Here's a closer peek at that:
 Yes, as you can see, I color like a 2 year old~~~ not staying in the lines! (among other things) Hee!
I added Stickles to the border around the image & sprinkled some pearls with my Viva Decor Paper Pen around the edge of my base card.
I used papers from the Fine & Dandy collection from My Mind's Eye for layering & for embellishing. I cut out the banner & sun with clouds from the paper as well. I wrote 4U FRIEND with a white Signo gel pen.

Here's a peek of the innies:
It isn't crooked, it's just tilted ;) soooo need to fire the photog! ;)

Thanks so much for peeking today and thank you, Wendy, for inviting me to guest design. This week's challenge is up on the Digital Delight's blog so be sure to play along!
Gotta Go!


The 411
Stamps: Circular Tree Background (Digi)- Digital Delights by Louby Loo
Paper: Fine & Dandy- MME, Neenah White cs, Bazzill bling cs
Ink: Chestnut Roan- Colorbox
Tools: Cricut, Gypsy, Wild Card cartridge, EK Success Circle Cutter
Other: Copics, Stickles, Viva Decor Paper pen- opal, Flower Soft, HB sticker- Stampendous

Thursday, March 17, 2011

Fluffy's St. Patty's Day Card

Hi friends,
I wanted to share a card I made for my sweet guinea pig Fluffy (he died last year.) My fellow Glitterbee, Mary, made this adorable card, and as soon as I saw it, I thought of Sir Fluff. Even though the image is technically of a hamster, it looks a lot like a guinea pig :)
Here's a pic of Fluff:

Here's my card:
Ok, so Fluff-n-Stuff was more white in the middle- but look at how adorable they both are! The image is from Hambo stamps & it's called St. Pat Hamster.  I made the shamrock-shaped card on my Gypsy & cut it out on my Cricut. The shamrock is on the Everyday Paper Dolls cart. I cut out a layer from patterned paper & outlined it with Moss Green Viva Decor Paper pen. I love how my Sweet (& uber talented) friend, Sankari does that with Liquid Pearls :) I find myself doing that more & more.
Here's a closer peek:
Mini-Fluff is colored with Copics (Body: E41, E53, E25, R20, R30 clothes: YG11, YG13, YG17  Pot & hat: C1, C3, C5, C7, C9 )
I colored the gold coins with Gold Smooch & the shamrock on his hat with Green Smooch. I printed the image twice, colored the coins & shamrock & popped them up with foam tape.

I don't usually make cards for myself, but this one is for me. It will sit in my craft room to remind me of how lucky I was to have that sweet fur baby in my life. Uh huh... i miss him :(

Thanks so much for peeking today :)
Go give your fur babies some love today.


The 411:
Stamps: St. Pat Hamster- Hambo Stamps
Ink: Chestnut Roan
Paper: St. Patty's Day- Best Creations, Bazzill CS
Tools: Shamrock punch- MS
Other: Copics, Smooch, Viva Decor Paper Pen, Rhinestone bling-K&Co, Ribbon

Tuesday, March 15, 2011

Cardabilities DT Reveal Sketch #27

Hi friends,
'Tis the Ides of March, but that's good news cuz that means it's time for another brand spankin' new Cardabilities sketch reveal!
Here's sketch #27 by the sketch master Karan Gerber:
Here's my card: (two ways :)


I went for a vintage meets romantic a la shabby chic feel. The first card is the one at the Cardabilities blog, but I decided to make my own flower & make it even more romantic by adding pearls instead of bling.
Here's a closer peek:
These ribbon flowers are way easy, dimensional, & are quite pretty IRL.
Here's a side peek:

I luuuuv the stitch detail on the sketch, but I so don't sew, just faux :( Why you may ask??? well, ok, I'll admit it. I'm kinda afraid I'll sew my fingers together or something----> eeek! Yes, I'll pass up the sewing machines in the store & I'll hear the theme song to "Jaws" in my head as the needle goes up & down---> slowly at first, then at full speed coming after my fingers!!!
Maybe if I had this awesomely amazing sewing machine I would get over my fear, right!?
Ahhhhh!!! Cuteness :)  It's not a toy, by the way, it's a regular sewing machine. Sadly, I can't find this particular version anywhere :(

I hope you get a chance to play along with this sketch so I can envy your stitch work! Be sure to Linky your card to the Cardabilities blog by the 29th & while you're there, treat yourself to the amazing work the rest of the DT has created for ya.

There's a tut on SCS on a stitched ribbon flower. They use lace trim, (I used satin ribbon) but the steps are the same. You can find that tut----> here.

Thanks so much for peeking today!
Gotta Go!


The 411
Paper: Lost & Found- My Mind's Eye, Cameo Coral, Blush Blossom-SU
Ink: Chestnut Roan, Creamy Brown- Colorbox
Tools: Nesties Butterflies Two, square punches
Other: Cream Viva Decor Pearl pen, Flower- Bo Bunny, Ribbon, Pearls, bling

Sunday, March 13, 2011

So Lucky... to Have Her

Hi friends,
Hope this weekend is treating you well :) Today I have a card that's going to my son's teacher with the pot of gold box I shared ---> here.
My blog pal, Kathy, is part of the Designed2Delight's DT and posted THIS fab card. (Aren't they lucky to have her :) Well, I luuuved the (digi) image of the shamrock in the jar & had to get it :) plus, Kathy always makes fabby cards so she has me at "hello" ;)
Here's my card:
The little shamrocks are colored with Copics YG11,YG13, YG17 outlined with C1, the jar is accented with BG10 & the cork E41, E53, E25. Then I added celery Shimmer paint to the shamrocks which gave them a really pretty shimmer but totally wiped out the shading/highlighting of the coloring! Ha! Ah well :( I also added some Stickles under the shamrocks cuz if I had a jar of shamrocks there would be a sprinkling of Pixie Dust in there with them :)  Then I covered the image with Crystal Lacquer to give the jar a glass look.

Here's a closer peek at that:
Sorry for the glare :( I die cut the shamrock from an old Sizzix die & hand wrote the sentiment.

Here's a peek of the innies:


This card also meets a few challenges out in the blogosphere:
Paper Play Challenges: Shades of Green
Creative Card Crew: No flowers
Shabby Tea Room: Inspiration pic-Luck of the Irish
Simon Says Stamp: anything goes
CPS- sketch 208

Thanks so much for peeking today!
Enjoy the rest of your weekend & don't forget to set your clock forward 1 hour!
Gotta Go!


The 411
Stamps: Wee Bit & Lots o' Luck (Digital)- Designed2Delight
Ink: Chestnut Roan- Colorbox
Paper: St. Patrick's- Best Creation Inc, Mira- K&Co, Garden Green- SU, Bazzill green CS, Neenah white CS
Tools: Copics, Shamrock die- Sizzix, Retro diamonds EF- Quickutz
Other: Ribbon- offray, Shimmerz, Stickles, Crystal Lacquer

Thursday, March 10, 2011

Celebrating You

Hi friends,
I've been so busy with school stuff since report cards are due. It's so seriously cutting into my lovely crafternoons which i don't likey at all :(  Maybe I should just give them all A's :) What do you think??? Ah well, I was able to get this card in for a few challenges this week.
Here's my card:
This is a beautiful image from the Friendship Jar Spring Fillers stamp set from Papertrey Ink. It's colored with Copics YR12, YR15, YR18, YG93, YG95, YG97, and shadowed with C1.
I usually cringe away from oranges (no, not the fruit- the color :) but it's one of the colors for this week's CR84FN color challenge:
So this particular color challenge was really a challenge! But I guess that's why it's called a color challenge and not a color simple, right? ;)
I also distressed the edges a bit with my Tonic (T!m Holtz) distress tool for this week's Papertrey Ink Challenge #5: Distressing Edges
and used this week's sketch at JUGS.

Thanks so much for peeking today! I've gotta go back to school stuff now.
Gotta Go!


The 411
Stamps: Friendship Jar Spring Fillers, Inside & Out Birthday- PTI
Ink: Memento black & Rich cocoa, Creamy Brown- Colorbox
Paper: Terra Cotta Tile, Kraft- PTI, Mira- K&Company, Neenah cream
Tools: Copics, Butterfly punch- MS, Tonic Distressing tool
Other: Viva Decor Pearl Pen- Gold, Ribbon -PTI, Stardust glitter pen

Wednesday, March 9, 2011

The ABC Challenge: P is for...

Pearls!
Hello friends,
Welcome to a new challenge this week at The ABC Challenge. This week, the challenge is P is for Pearls- one of my absolute faaav embellies! (Probably because I'm a June baby & pearls are my birthstone :)
Here's my card:
 This is a Sarah Kay stamp called Spring is Back. This is a very detailed image so it is a colorista's delight!
Here's a closer peek:
 There is a pearl swirl along the edge, on the middles of the punched pansy border, & larger ones on the edge of the panel. I added Stickles to her bell bottom ruffled hems & to the middles of each flower.
Copics used: skin E000, E00, E11, R20  hair Y23, YR23, E35  pants BG11, BG13, BG18  top R30, R32, R35 Hat E31, E41 flowers R20, R22, R24, R29, R59, Y11, Y13, Y18, YG13, Pebbles T1 and the entire image is highlighted with BG10

Here's a peek of the innies:
 Kept it simple & I even added pearls on the middles of the punched pansy border with my Viva Decor pearl pen.

The letter P is brought to you by

Whiff of Joy will be giving one lucky person Miss Ladybugs stamp- (soooo pretty). I ordered my WoJ stamp, but it didn't get here in time for my card :( it will see some ink soon :)

So are you ready to show us your pearly whites, creams, & colors? Remember to linky your card creation by Monday March 13th and please be sure to stop by The ABC Challenge blog to see the gorgeous cards the rest of the DT has created for ya.

My card also meets the following challenges:
The Sweet Spot- Sketch
The Crafty Pad- Ribbon
Cute Card Thursday: Signs of Spring
Delightful Challenges: Spring
Terrifically Thrilling Thursdays @Shelly's Images- Layers, layers, layers

Thanks so much for peeking!
Gotta go!


The 411
Stamps: Spring is Back- Sarah Kay, Oval All- SU
Ink: Memento Black, Creamy Brown & Chestnut Roan- Colorbox, Close to Cocoa- SU
Paper: Fine & Dandy Tickled Pink- My Mind's Eye, Bazzill CS, Neenah White
Tools: SU Oval Punches, Pansy Border Punch- MS
Other: Prima flowers, Pearls- ZVA, Viva Decor Pearl Pen, satin ribbon- PTI, Stickles, Copics

Monday, March 7, 2011

Lucky Cake

Hi Ya Crafty friends,
What's this...???

Oh that could only mean one thing...
PROJECT TIME!!!

Yes, I thought I would share the gift I made & will be giving my son's teacher for St. Patrick's Day. It's been a while since I had a project for ya, & I wanted to get it out to ya so if you wanted to make one for yourself, you'd have time to do it. This idea has been swirling in my brain since last year, but I have more ideas than I do time, so it had to wait :( sigh...

When you open the box, here's what's inside:
Side view
Aerial shot:
It's a pot of gold that holds 5 yummy Ferrero Rocher chocolates :) mmmmm...

How did I make this pot of gold chocolatey goodness, you ask??? Well, it's actually made using the Sizzix pop-up cake die! Before I show you how I did it, let me give you a few more deets about the finished project.

The box is wrapped with this beautiful ribbon that was in stores in December- yes, that's Christmas ribbon! but it fit perfectly with my project, right? The bottom edge of the lid is punched with the hydrangea punch, but it looks like little 4-leaf clovers when punched in green :)

This was actually quite easy to create because the papers were so beautifully imprinted with glitter. They are from the St. Patrick's Collection from Best Creations & I let them do the heavy lifting of embellishing the box.

I wrapped a sheer ribbon around the pot & made two bows so that it looked like the four leaves of a 4-leaf clover.
Here's a closer peek at that:
Then I simply added a gold button with gold floss to the center. I punched out some shamrocks & tucked them in with the chocolates. Simple, right!?

So here's how I did it:
1) Using the Sizzix cake die (pop-up), assemble the cake as you normally would, except don't adhere the base to anything. Use black cardstock or green if you'd like.
Here's the cake assembled:

2) Now fold over & adhere that little top piece (half-circle) and turn your cake into an upside-down cake. Yes, flip it over!
Voilá! You have a pot!
3) Add Scor-tape to the inside tab (or trim it) & adhere it to what will be the pot bottom.


Now your pot is ready to be filled!

Be sure to use strong adhesive to adhere the pot bottom to your box base before filling it.

Here's the finished project again :)
The ideas have been swirling in my head since making this project! You can turn this into a witch's cauldron for Halloween! I have a couple more ideas & projects that I've made with this die using this concept I can't wait to share with ya. So if this die has been collecting dust, shake off the cobwebs & get ready to play!

What do you think? Hope you liked this simple little project & you give it a go!
You can find the directions for making the box in a previous tutorial---> Here.
Sizzix & Stampin' Up both have video tuts on assembling the cake so I didn't feel I needed to reinvent the wheel, kwim???

Thanks so much for peeking today!
Gotta Go!


The 411
Paper: St. Patrick's- Best Creation Inc, Bazzill cs
Tools: Sizzix Pop-Up Die: 3-tiered cake, Hydrangea border punch- MS, Shamrock punch MS
Other: ribbon, gold button- American Crafts, Scor-tape, gold lame floss
Blog Widget by LinkWithin